SEPTEMBER 2021 HELLO FALL
Posted by Donette littlecottagequilts@gmail.com on
Hello everyone!
It seems my schedule for this blog/newsletter has shifted to the middle of the month instead of the first of the month. LOL !! I guess that’s OK. Summer is winding down, days are shorter and some leaves have started falling here in our area. Cooler nights and more thunderstorms grace the sultry afternoons. No wonder they call it the dog days of summer. All I want to do is lay around. But alas, everything else seems to be ramping up. Life is an ever evolving chain of endings and beginnings. One thing after another marches along like a steady line of ants. Summer vacations are over and school starts a new year. Our summer garden plants are dying off as new winter gardens are beginning. (any suggestions for a basket full of green tomatoes??) I finish one quilt and start on another one. The longarm machine runs steadily. The days and weeks seem to meld into one continuous time warp, endlessly marching forward.
I am still busy in the sewing studio working on custom orders and shop samples. It really is my sanity fix. I am almost finished piecing the 28 - 12” blocks for a custom quilt.

Then sewing them all together and off the my long arm to quilt. I have great plans to start a quilt for myself, I think I mentioned it last month, the beautiful spring colored “Fracture” quilt. At this rate tho, I’ll be lucky to get it finished by next spring! I’m sure y’all can relate.
Life gets in the way of the things we “want” to do. I have resolved to be better at taking some time for me in this crazy world. Time to do a few things I want to do and a few things that are good for me. Making a project for myself for a change. Working on the landscaping around here. I started an exercise class (oh my aching body). I will start working on my Fracture quilt. Taking time to visit with the kids a bit more often. Just admiring a beautiful sunset or enjoying a cool breeze. Taking time to “smell the roses” as the saying goes.

I think we all need that. Especially during this very stressful and uncertain time. Taking time to focus on the positive and cope the best we can with all the negative. It’s an ever changing world and environment today. It seems that the “good old days”, when everything stayed the same for decades, is a thing of the past. Things seems to change weekly now, and I find it a struggle to keep up.
As expected, things at the shop have slowed down being open just 1 day a week. It’s all good. Y’all have been so kind about it. Arranging your quilt shopping trips around Wednesdays and calling to check if we are there. We do really appreciate it.
In September, the Holiday season starts to creep up on us and Christmas projects move to the top of the list. We have a few new fabrics trickling in, some nice prints and blenders arrived in August. We have more prints and 3 new wide backings coming in the next couple of weeks.
We still have some AMB Solids left at 30% off. A great time to get stocked up on basics.

I am having a very difficult time finding nice traditional Christmas prints this year. I’ve been looking for months. I’m very sad about it. Most everything I have seen we already have, is odd colors or strange designs that don’t really say Christmas to me. Thank goodness we still have a very large Christmas section at the shop and on the website to choose from. I’m always hopeful and on the look out for that perfect collection that screams Holidays. Fingers crossed for success with that!
More and more quilts are coming in to be longarm quilted for the season. So if you are planning to have a quilt quilted for the Holidays, please be timely in getting it to me or to whom ever does your quilting for you. It’s the busiest time of the year for everything, including quilting. My cut off date for quilting guaranteed by the 15th of December, is November 1. That allows time for you to get the binding done. Keep in mind, the sooner you get it to me, the sooner it will be ready.
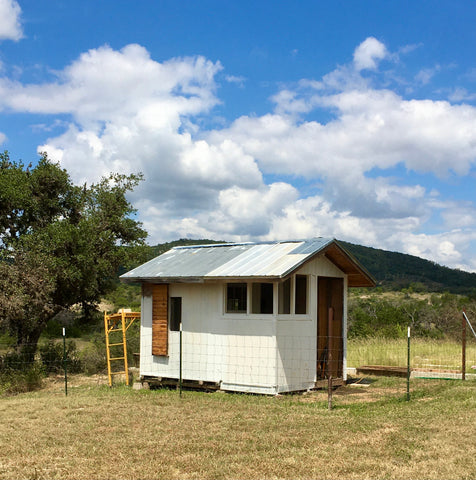
It seems to be the norm around here to always be behind schedule. Every 15 minute job seems to takes a week to get done. So is the saga of the the little cat palace! Who would have thought that this tiny building would be 4 months in the remodel ?!?!??? You would think that it would be a quick job, but working in a tight confined space is much more difficult than is seems. It’s a virtual rubic cube with equipment and supplies. But it’s finally on the home stretch. LOL !! It’s the most posh cat house I’ve ever seen. MEOW! I have completed the painting on the inside and we have assembled all the built in parts. Just have to do the final screening on their observation porch and we can move them in.


The exterior painting will get finished when cooler weather prevails and the paintbrush doesn’t gum up in 30 minutes. This is the final report on this project turned pain in the neck. On to bigger things and my mud room on the old farm house before winter season hits. Fingers crossed that it goes a bit smoother. So we can pick up the pace! (hoping the exercise class helps get us into better shape)
Tip of the Month
September 2021 Tip:
Use a Clapper to get the flattest seams and joints. A Clapper is a great tool adopted into the quilting world from the garment industry. You’ll wonder how you managed without it.
Safety protocols are still in effect, we are trying to make sure everyone is safe. PLEASE, honor these:
FYI: we are fully vaccinated, but many aren’t. Please respect the well being of others
Thank you so much for your respect and cooperation.
for further information call 830-589-2502
email : littlecottagequilts@gmail.com
web orders or shop pick-up: littlecottagequiltshop.com
We are here to help you as much as we possibly can.

Warriors Heart Quilt project
As we approach the Holiday season, our hearts go out to those suffering. Some of them in silence. If you can, please consider giving to those who are lost and alone. Warriors Heart has a constant revolving census and are in continual need of more quilts. We so appreciate y’all who have contributed to this amazing cause. Thank you so much for your participation. Please keep them coming.
“Warriors Heart” is a treatment center for physiologically wounded active military, veterans and 1st responders. Sometimes these wounds are the most long lasting because they are unseen. You can check out Warriors Heart on their website. www.WarriorsHeart.com
It’s easy and simple to do. You may choose any pattern you wish. Quilts must be no smaller than 44” X 58” or larger than 60” X 72”. Each snuggle quilt must be finished completely, (quilted, bound & preferably have a label about the person who made it) and returned to Little Cottage Quilt Shop. Once turned in, all finished quilts become the property of Little Cottage Quilt Shop and will be donated to Warriors Heart in Bandera, Texas.
Valuable Info
Quilting - Lesson 4
By Donette Backlund
By now you should be well on your way to having a finished quilt top, or at least part way there I hope. I hope this tutorial has been motivating for you to get started and make your first quilt top. I hope that you have decided on a backing fabric and that it is pressed smooth and ready to go. Piecing the backing together is best done using a 1” seam. Then press the seams open. This allows the seam to lay flatter and be less noticeable on the backing. If you are using the selvage edges together, allow your 1” seam starting at the inside edge of the selvage. Then trim to a 1” seam after you have sewn it together. Press open.
The next thing on the list is quilting. How do you want your quilt top, batting and backing (the quilt sandwich) held together. You have options:
a. You can have it quilted by a longarm quilter. They typically need the backing and batting to be an additional 10” wider and 10” longer to attach to the machine frame. If you piece your backing, it’s important that the seams run side to side, NOT top to bottom. It’s a bit of physics. Seams that run top to bottom create a big lump right in the middle of your quilt, top to bottom, when it is wound onto the long arm frame. That twists the backing and creates an uneven distribution of the fabric. (sagging on the sides and too tight in the middle) Seams that run side to side do not built up. Prices for longarming will vary with the quilter and possibly the style of quilting you choose.
b. You can quilt it yourself on your sewing machine. Allow the backing and batting to be at least 3” larger on all sides than your top. This is a safety measure for the creep. I suggest you draw a diamond grid using an erasable marker (disappears at 140*) onto your quilt top. You will be sewing the straight lines on the diagonal. This allows you to “ease” any creep of the top to avoid pleats. Use a walking foot and a larger needle, a size 14 or 16. If your sewing machine has the feature that allows you to lessen the pressure on the presser foot, adjust it to less pressure. This will help prevent most of the creep.
Lay your pressed backing out on a flat surface, a large table or the floor. Smooth/stretch it a bit (not too much) and tape it down using wide blue painters tape. This will hold the backing in place while you finish assembling the sandwich keeping all layers even. Lay out the batting and smooth it out. Then place the finished top onto the batting and again smooth out any wrinkles or lumps. There are a couple of ways to stabilize the sandwich. You can pin it with basting pins. Curved basting pins is what I recommend. Pin starting in the center of the top, working your way outwards in all directions. Pin thru all layers using the width of your hand as a guide. You want a pin about every 3-4” in all directions. Use the diamond grid you drew onto the top as an additional guide so you won’t have pins where you are sewing.
Or you can use spray baste. If you are going to use a basting spray, spray the wrong side of the backing before you put the batting down. Very carefully lay the batting out and smooth as you go. Repeat the spray onto the batting and then smooth as you go the top onto the batting. Then proceed to quilt. A word about basting spray; I don’t recommend it for machine quilting. It holds for a limited length of time, it can gum up the sewing machine needle and it isn’t strong enough to keep the sandwich together under the pressure of the sewing machine feed dogs and the walking foot. Plus it’s messy!
c. You can hand quilt your sandwich. This method will require an old fashioned quilting frame. You can find them, but they are getting more rare. Stretch the backing, again about 4” larger than the top on all sides. Thumbtack to the frame itself or sew the backing to the leader on the frame depending on the style of frame you have. Lay out the batting and smooth it out. Then place the finished top onto the batting and again smooth out any wrinkles or lumps. Again, there are a couple of ways to stabilize the sandwich. You can baste it with large running stitches thru all layers. This will be removed after quilting. Or you can pin it with basting pins as described above. Or you can use spray baste. If you are going to use a basting spray, you will have to decide that before you start to assemble the quilt sandwich. Follow the same method as instructed above in method b.
Roll the quilt up on one of the bars, depending on the style of frame you are working on, until you have about 2 rows of working space exposed. Stencil or draw the quilting pattern onto the top. It’s best to do one row at a time to avoid smudging the pattern off as you turn the quilt. Quilt by hand stitching your desired pattern. Tiny stitches are best. Start at one corner and stitch the pattern across the side as far as you can comfortably reach. Roll the quilt and repeat stenciling and quilting each row until you have completed the entire quilt. Each quilting frame will have a different type of rolling mechanism for moving across the quilt as you quilt it.
d. You can “tie” the quilt sandwich. Having an old fashioned quilting frame to stretch it on is the best. But you can stretch and tape as described in method b. Add the batting, top and stabilize as described above in the methods b. and c.. Using 6 strands of embroidery floss or 2 strands of yarn in a large eye needle, run the floss or yarn from the top down thru all layers and back up thru all layers with about a 1/4” bite. Tie a double knot or a square knot on the top. Clip the floss or yarn about 1” long and fluff into a tiny ball. For bigger fluff balls use more strands of yarn or floss.
Once you have completed the quilting, trim off all the excess backing and batting even with the top. Use the trimming to “square” up the edges ready for binding. That’s the next step and Lesson 5.
Any questions, please email (probably the quickest response) or call me and I will be happy to help you as much as I can. littlecottagequilts@gmail.com 830-589-2502